There are so many people out there looking for an adequate alternative source of energy due to the fact electricity became pretty expensive. Now, given that solar is the most affordable energy solution at the moment, besides the fact it has some great environmental results, it is not strange that more and more individuals are becoming interested in its implementation.
The solar generator is only one part you will need for this endeavor to be working, but it can be pretty affordable making it on your own. So here is how you can build a DIY solar generator and what things you will need for this project.
Things You Need to Build a DIY Solar Generator
The reason people decide to create DIY portable solar generators is mostly because of the fact they can save up some money that way, but there are also some adventurous solar enthusiasts who see an opportunity to learn more about this technology through this endeavor.
But since the first reason is the most common one we will say that the most important thing for starters is to have good information about the cost of each part you will need, in order for you to be able to calculate whether or not this is something that will pay off.
Bear in mind that things can easily get out of control because it’s super easy to build an awesome generator if you are not counting each dollar you spend. On the other hand, you do need to invest in some good parts if you want this solar generator to last and withstand different weather conditions and environments.
Parts and Components
1. Sturdy Casing

When it comes to all the parts you will need for this project, firm and sturdy casing is in number one place. It needs to be very durable and high-quality made, waterproof and weather-resistant because it will hold all the important parts of the generator.
The one we recommend is the Pelican 1620 Case that’s padded with foam and comes with an automatic pressure equalization valve that will keep the water out of the case. It’s pretty customizable, and it has stainless steel reinforced padlock protectors.
2. Solar Inverter
It is a well-known fact that solar panels can generate only DC power, which is inadequate for any sort of home appliance, so you need to have a solar inverter that has the ability to transform direct current into alternating (AC) current.
This part is a bit expensive, you should know that from starters, but it’s necessary for the whole system to work. Even though the market is full of solar inverters, we recommend you think about investing in WZRELB 2000W Pure Sine Wave, given that it is high-quality made and suitable for both grid and backup battery power supply.
3. Solar Panel
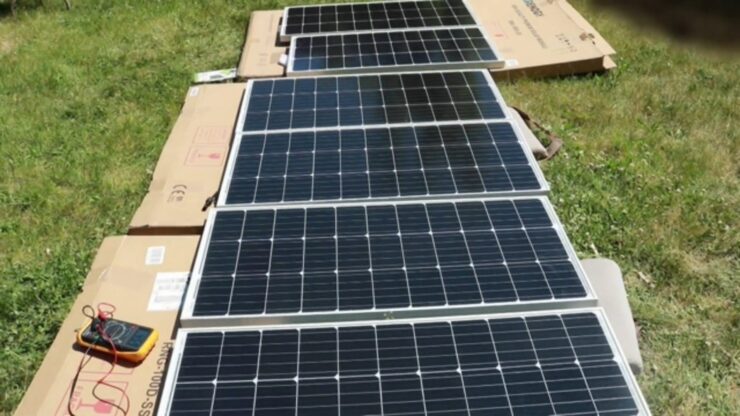
Every solar construction needs to be based on solar panels because generating power from the sun would simply not be possible without them. Solar panels have the ability to absorb the sunlight and transform it into electricity we can use for everyday needs.
This element is exposed to all weather elements, which is why you need to consider its quality and durability. The solar panel that’s on top of our list is the Renogy 100W Eclipse that’s completely waterproof and compatible with all types of batteries. It has great performance levels in any sort of environment, and it comes with a protective casing.
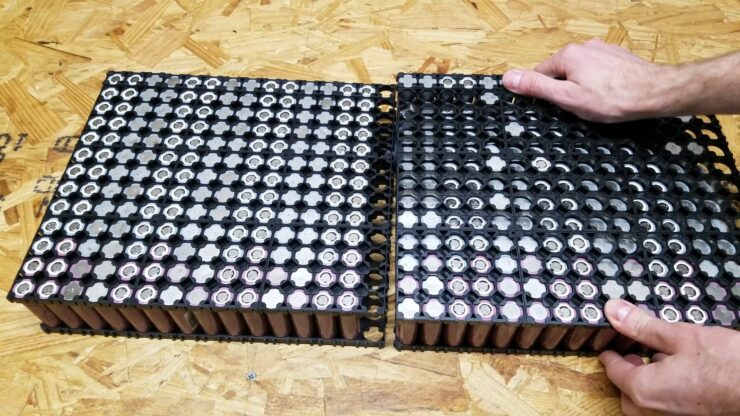
4. Battery
We cannot forget that every solar generator needs a solar battery that will collect and store the energy produced by solar panels. This is the part where you will have to conduct serious research given that the market is overflowed with these solar elements, especially because solar batteries come in all shapes and sizes.
However, according to experts, you should definitely go with a deep-cycle lead-acid or lithium-ion battery for the purpose of creating a well-working solar generator. Lithium-ion is especially popular because it has high efficiency, it’s portable and lightweight, and it usually has a pretty good and long warranty.
5. The Charge Controller
The whole solar installation would not be complete without a solar charge controller. It is a small compact device that will take care of your battery and its longevity by making sure it doesn’t overcharge every time the sun is high in the sky.
It will regulate the current levels and voltage that are traveling to the battery from solar panels. Since we are here talking about building a solar generator, it would be best to purchase a solar charge controller that has a moisture-tight coating.
6. Battery Maintainer
Every DIY solar power generator also needs a battery maintainer. Now, you may be confused thinking this part is the same as the solar charge controller, but it’s not actually.
A battery maintainer is another device that will keep your battery protected, but in this case, by supplying it with small amounts of electricity when needed – which is when the battery is completely inactive for a long period of time. It is a piece that will prolong its lifespan.
7. AC Power Inlet
AC power inlet is a connector, an exterior one you can find on the hard case. It is a small part most people would forget to think about, but a key one in order for the generator to work in the end.
It would be best to choose the AC inlet that doesn’t need hand wiring or cable modifications and the one that comes with a long extension cord.
8. LED Flood Light
If you have room in your budget, you could buy a LED flood light in order to install it on your solar generator. That way, you can be sure you will have the source of light whenever you are somewhere off the grid, like in a camp, in a shed, on a boat, etc.
Also, it will be a great addition to your home in case of a power outage or some other emergency situation.
9. 12V DC Meter
And the last piece of equipment you need in order to make your solar generator a complete masterpiece is a 12V DC meter. We are talking about a device that’s in the form of a display that has the ability to show you what’s the status of your generator – how much power it has stored, so you can know whether or not you can count on it in specific situations.
This part is quite an affordable one, and it is a great addition, so don’t miss purchasing it.
10. Tools
Every person who is wondering how to build a solar generator probably knows it is expected to have some tools at its disposal.
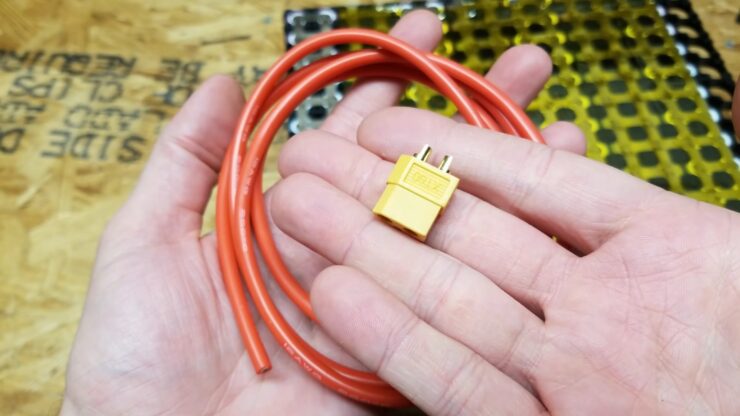
In this case, you will need some basic items like a utility knife, a wire stripper with a cutter, a drill with drill bits or grinding extensions, a hot glue gun, and a set of screwdrivers.
Step by Step Instructions
Okay, now that you know what all the parts you need to acquire are and what are the tools you will need during the process of building a solar generator, it is time for us to lead you through a step-by-step guide that will make it all much more understandable.
Step 1
In order to build your own solar generator, you need to start from scratch. And that means thinking about the logistics. Your solar generator needs to be fully functional and easy to operate. That’s why you need to think through every step you are going to make regarding installing all the components into the casing.
For instance, you need to think about how you want your generator to be positioned when in use, and based on that consider where to place all other parts.
A DC meter is a device you should locate in an easy-to-read place, and outlets like chargers or plugs should be approachable and preferably next to each other. Also, you need to consider the size of your casing and establish whether or not everything will fit nicely in it.
That means you will have to think through how each part will be mounted and find a way for them not to interfere with each other. After all that, you can start drilling holes and inserting one part after another very carefully.
Step 2
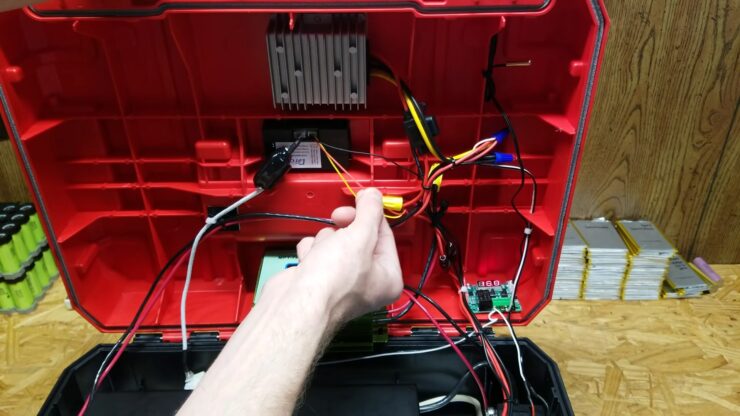
Step 2 should be based on connecting all the electrical components. So after positioning things like the DC meter and other outlets, you should install the battery into the casing. Then you will have to connect battery terminals with a DC meter using only insulated wires. And please don’t forget to first connect the negative and then positive wires. The same process applies to other outlets. You should also use insulated wires to connect them to the battery.
And it is important to check if all connections are properly secured and tight. After you do all that, the next move should be to connect the solar panel to the battery, and when it comes to this step, you can create a temporary or permanent connection of this kind.
In order to attach the solar panel to the battery permanently, all you need to do is to make the connection directly, from one part to another, like with all other outlets. But if you want that to be just temporary, you should use quick-connect plugs as a bypass solution. At the end of this process, your solar panel will be ready for usage.
Step 3
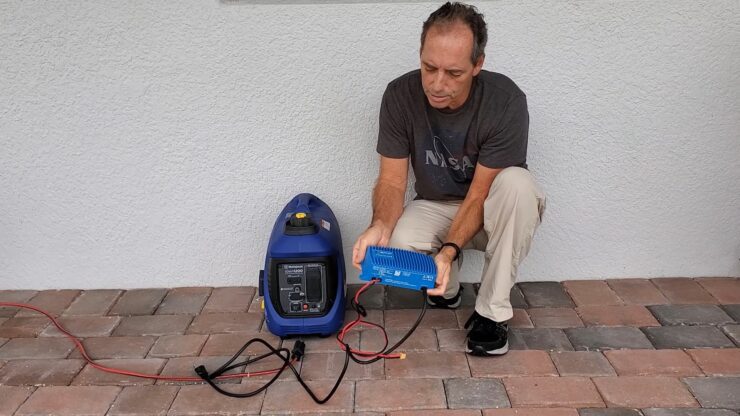
The next step is basically the last one, at least when it comes to building your solar generator, and it demands testing it, its functionality and its performance level. In order to do that, you will have to place your generator at a location where there’s a lot of sunshine and let it do its magic. Depending on how long are the power wires of your solar panel, sometimes you can place the panel out in the sun and keep the battery box in the shade to protect it from extreme weather elements.
At this point, your DC meter should start showing the voltage that your panel is drawing into the solar generator. If everything seems normal, you should leave it that way so that the generator and solar panel can do the work properly and to the maximum.
Step 4
If you subject your solar generator to thorough testing, and you establish that everything is fine with it, you can feel free to start using it for your needs – for powering up your appliances. It’s up to you now to decide whether or now you want to keep the solar panel in one place and only disconnect the case and bring it with you wherever you go, or you want to make it portable as well.
In the beginning, you should monitor your system and see how much time it takes for your devices to get fully charged on your solar generator and what’s its status afterwards, so you can understand better how long you can count on it. Also, make sure to know how long it takes for the battery to get recharged in the sun.
Why Build Your Own Diy Solar Generator
We made sure to explain to you how to make a solar generator in many details. But now, here are the reasons why you should do it or at least some of them:
1. Safety
It’s been proven that solar generators are much safer to use than those based on fossil fuels, no matter if you need them for indoor or outdoor reasons. Solar generators simply cannot leak or cause a fire.
2. Green Energy
There is no doubt that solar generators are environmentally friendly and that they come with zero emissions. They simply won’t pollute the air and the entire environment like fossil fuel devices would for sure.
3. No Running Cost
Okay, yes, you will have to invest a certain amount of money in order to create your solar generator, but it will all pay off pretty quickly, given that using and maintaining this device won’t cost a thing. Also, most of the components you are about to use for your solar generator come with more than 20 years of warranty.
4. Easy to Repair
As you can see, it’s not that hard to build a solar generator on your own. It just needs a bit of time and quality research. The same is with maintaining and repairing it. Unlike generators that work on fossil fuels, these mechanisms don’t have such a complex structure.
5. Affordability
The fact is – building your own solar generator will cost you much less than buying one in a store. The secret lies in buying each component separately and knowing how to connect them. According to some experts, you can save up a lot of money this way.
6. Accomplishment
And in the end, let’s not forget about the feeling of pride and accomplishment when you finish working on your solar generator and see it running smoothly. It’s simply priceless, and it can allow you to spend some quality time with other members of your family.
FAQ

1. Can a Solar Generator Power Up the Entire House?
Solar generators aren’t designed for the purpose of supplying the entire house with enough power. So no, they won’t be able to provide enough electricity for all household needs. The reason is simple – they don’t have enough wattage capacity for that. Solar generators are ideal for your boats, RVs, for some emergency situations or camping needs.
2. How to Determine What Size of Solar Generator Do I Need?
The answer to this is pretty simple – you need to establish what are your power needs, for starters. The simplest way to do that is to do the calculation based on all power ratings of appliances and tools you use the most. You should take into consideration only those you want to charge with a solar generator.
3. What Is the Lifespan of Solar Generators?
If you are wondering for how long you will be able to count on your solar generator, you should know that most of them last for about 20 to 30 years. That means your investment is pretty much safe and that it will pay off for sure.
4. What Can Solar Generator Power?
There is a huge list of devices, tools, and appliances that can be charged by a solar generator. We are talking about all the regular electronic devices we use every day like a smartphone, television, and laptop, but also lights and most smaller applications. But know that you shouldn’t try to use them on bigger items like your refrigerator, washing machine, etc.
Conclusion
If you are a solar enthusiast, you will most likely appreciate this article and maybe feel encouraged by it to dive into this process and maybe do your first DIY solar project.
Sure, you can always take your credit card, visit some online sites or regular stores and purchase a ready-build solar generator, but if you have at least a little sense of adventure, you will get the components and tools you need and slowly build one by yourself. The truth is that it’s not that hard, you will just have to be patient and believe in yourself.